Thursday, December 27, 2012

Post Holiday Bloat

So, a couple people have asked me about battling the post holiday bloating. So I figured since we still have one holiday left to battle (New Years) now would be a good time to talk about it.

First, what causes bloating? There are a number of things that cause you to feel bloated and retain water the number one being sodium consumption. During the holidays with all the crazy good (bad) food, there is a lot of sodium floating around. So you consume way more than you generally would. Increased levels of sodium cause your body to retain more water. Also the increased consumption of heavy food weighs down those intestines of yours. That paired with alcohol consumption can lead you to feeling pretty weighed down.

1. The first thing you are going to want to do it get some water in you. That probably is the last thing you think you need but increased hydration will help level out your sodium levels and keep your intestines moving (if you know what I mean). Stay away from the sodas, ya they make you burp but they also contribute to the gas issue. Just stick with water!!! Trust me! If water is to boring for you dress it up by adding lemon, lime, or orange slices to it.  Crystal light is another option. Eating some watery fruits can also help to rehydrate you. Try have a bowl of cantaloupe for breakfast its very water dense and has good sugars and great vitamin set.

2. Cut out the salt. You got plenty over the holidays plus if you are eating any processed food there is enough in them alone. So no picking up the salt shaker for the next couple days. Try not to eat out since restaurant food is super sodium packed. The best bet is to go fresh and unprocessed for the next couple days. Watch the nutrient labels, because many super salty processed foods don't necessarily taste salty.

3. Watch how much dairy you consume. Though good for calcium consuming to much dairy can cause bloating due to not having enough enzymes to process all the lactose.


4. Certain minerals cause you kidneys to excrete more sodium, specifically potassium. So eat those nanners (bananas), but also mangos, melons, spinach, tomatoes, and nuts. Try and stay away from fruit juice since they can have added sugars. White processed sugar is an inflammatory we want to consume anti-inflammatories.

5. The most important!!! Get off your butt and get moving, go to the gym and try to get a good sweat going. You lose a fair amount of sodium when you sweat!!! So get those leg warmers on lol. Go for a run or come in to Fox Fitness for some cardio classes www.foxfitnessbjj.com you can check out our schedule online. Not only will this relieve some of your excess sodium but everyone feels better after working out. The endorphins that are released during exercise will make you feel warm and fuzzy instead of fat and bloated. Yeahhhhh


Sunday, December 23, 2012

90 Day Challenge Workout: Week 2

Pre-Christmas Cardio Blitz: this is going to be a challenging workout. But it will make you feel better about the bonbons you are about to eat.

Warm-Up
20 Jumping Jacks
20 Functional Squat Jump
10 Iron Cross (Stretch)
10 Scorpion (Stretch)
20 Bird Dogs
1:00 Jog in place

Go Time (each set of exercises will be completed 2 times for a total of 4 minutes)
:20 Burpees
:10 Rest
:20 Seal Jumps
:10 Rest
:20 Jumping Jacks
:10 Rest
:20 Mountain Climbers
:10 Rest
Repeat
:90 Active Rest (jog in place)
Set 2
:20 Bodyweight Squat
:10 Rest
:20 Push Up
:10 Rest
:20 Jump Split Squat
:10 Rest
:20 Dive Bomb Push Up
:10 Rest
Repeat
:90 Active Rest
Set 3
:20 Plank
:10 Rest
:20 Jack Knife
:10 Rest
:20 Flutter Kick
:10 Rest
:20 Superman (pulses)
:10 Rest
Repeat
:90 Active Rest
Cool Down/Stretch

Have a healthy, safe, and fun holiday.


Wednesday, December 19, 2012

What danger may be lurking in your sports drink!

Brominated vegetable oil is an ingredient added to citrus drinks to keep the fruity flavor from separating. About 10% of drinks sold in the US contain Brominated Vegetable Oil. These drinks include some Pepsi products, Gatorade, Coca-Cola products, Fanta, Sunkist, squirt, Dr. Pepper products and many others.

Brominated vegetable oil contains bromine, the element found in brominated flame retardants, used in things like upholstered furniture and children’s products. Research has found brominate flame retardants building up in the body and breast milk and have linked them to neurological impairment, reduced fertility, changes in thyroid hormones and puberty at an earlier age. While most people have limited exposure to brominated vegetable oil, an extensive article about it by Environmental Health News that ran in Scientific American last year found that video gamers and others who binge on sodas and other drinks containing the ingredient experience skin lesions, nerve disorders and memory loss.The European Union and Japan has banned this product from use. Hmmmmm, plain water is sounding tasty right now or maybe some coconut water. Be careful what you put in your body, always check labels!! Though this chemical has not been fully tested long term to know its complete effects on our bodies there are definitely healthier options just in case!

Wednesday, December 12, 2012

90 Day Challenge Workout: Week 1

This workout will work on your stability and prep you for the increased workload you will see over the next 90 days of the Challenge.

Do these exercises as a circuit. Complete the circuit 3 times and Rest 2 min between circuit sets.

1. 30 Body weight squats
2. 20 Push-ups
3. 10 Shoulder Push-ups
4. 20 sumo squat
5. 10 Incline Narrow Push-ups
6. 20 Single Leg Hip Raise
7. Abs
a. 50 crunches
b. 40 bicycles
c. 30 flutter kicks
d. 20 kick outs
e. 10 jack knifes

You still have time to sign up for our 90 day challenge. Please go to our website to sign up www.foxfitnessbjj.com

Thursday, December 6, 2012

Myofascial Release Techniques

Myofascial release is used to treat trigger points, muscles that are painful, characterized by taut bands or where the tissue has become thick and knotted, that can occur due to developing a poor kinetic chain, injury, or overuse.

You have fascia all over your body. It is a specialized connective tissue that surrounds the muscles, bones, and joints giving supports and protection. There are superficial, deep, and subserous layers as well as 3 types: dense connective tissue, ligaments, and tendons. The dense connective tissue extends from the tip of your head down to your last little piggy in one continuous piece. People generally don't think about there fascia, but it does a lot, transmitting mechanical tension (caused by muscle activity).

Self myofascial release is relatively easy and have been shown to reduce pain and increase Range of Motion (ROM). Spend 1-2 min per area and unsure your abdominal muscles stay tight to protect the spine.

Adductor:


1. Extend the thigh and place foam roll in the groin region with body face down.
2. Be careful when rolling in the adductor origins of the pelvis
3. If you find a tender spot, stop rolling and hold on that spot 45sec or until pain is reduced.


Hamstring:
1. Place roller under legs with hips unsupported
2. Feet can be crossed if you want to do one leg at a time.
3. Roll from knee toward posterior hip
4. If you find a tender spot, stop rolling and hold on that spot 45sec or until pain is reduced


Quadriceps
1. Body is face Down with foam roller underneath legs
2. Make sure you keep your core tight to protect your back
3. Roll from pelvic bone to knee, make sure you get the outside thigh good
4. If you find a tender spot, stop rolling and hold on that spot 45sec or until pain is reduced


Iliotibial Band
1. Lie on your side with the foam roll positioned below hip bone.
2. Raise the bottom leg, this can be painful so do this move sparingly
3. Roll from the hip joint down to the knee, you should be hitting the outside of the leg when your rolling.
4. If you find a tender spot, stop rolling and hold on that spot 45sec or until pain is reduced


Upper Back
1. Hug your chest or place your hands behind hour head (like a sit up). This will open up your shoulder blades
2. Raise your hips till they are unsupported.
3. Roll mid back ensuring that your head remains supported.
4. If you find a tender spot, stop rolling and hold on that spot 45sec or until pain is reduced.


Monday, December 3, 2012

31 Days of Christmas Submissions: Day 7

Triangle Variation: I use this a lot, especially when training with men. If you find yourself in the position where you are trying to finish an arm bar but can't for whatever reason, this is a great move.

Position 1: start from the arm bar, slide your right leg (leg closest to your opponents hips) through your opponents arms and Down to the floor. Make sure that the back of your ankle is flush to the persons neck.


 Position 2: Let your other leg relax and fall to the mat. Reach your left hand under your opponents neck to grab your own ankle.


Position 3: while still holding on to your ankle fall backwards onto your right side, pulling the person with you as you fall. Hook your free leg over your foot. Squeeze your knees together. Note: DO NOT let go of your ankle, holding onto the ankle is what is creating the choking 
effect!!!


Thursday, November 29, 2012

31 Days of Christmas Submissions: Day 6

Triangle Choke: Making men look like boys since, well forever.. J/K But seriously. The key for the triangle choke, well to make it super tight, is to make sure you shoot your hips as high up to their face as you can.


Position 1:
 Position 2: While gripping one or both wrist pull the person to you, using your legs. When you do this they will want to get back to their base by sitting back up. When they go to sit back up that is when you act.
 Position 3: Pick an arm as they sit back and push it to their chest. ( Nobody is going to let you just man handle their arm back to their chest that is why you perform the step that was liste above)
 Position 4: Pick your but up off the ground and swing your leg over the arm you just pressed to their body. Placing it tight to the neck. If you do not shoot your hips up high enough when you do this it will be difficult to tuck your ankle under the other knee. Save yourself the struggle and a failed triangle attempt and work on your abdominal strenght.
 Position 5: If needed reach up and pull your foot toward you, so that your ankle rests under the knee (your knee pit, as some may call it). Lock you akle down tight by bending the top knee.

Finally pull down on your opponents head while trying to squeeze your knees together.. If it still isn't tight enough, take your right arm and under hook the opponents knee.. Pull yourself towars their knee this will make your knees pull together tightening up the triangle.  Happy Choking!!!


31 Days of Christmas Submission: Day 5

Armbar From Guard: This is a very basic submission but I find for new people it sometimes takes the longest to get right. The real key to alot of submissions from your back is lifting your butt up off the ground. You basically stay in a reverse crunch for alot of the time. That reduce the amount of surface area and makes it easier for you to move.

Position 1: Grip the same side wrist and cross grab your opponents triceps.
 Position 2: On the side you have the arm trapped, bring the foot up to the persons hip and apply pressure. Be sure to keep the knee pressed tight to the shoulder this will keep them from pulling their arm out!! (press into the persons hip with your foot, this will aid you in shifting your body to the side)

Position 3: Turn your body to the side placing the opposite leg (the one under the arm) tight accross the back.
 Position 3: Swing your leg over the persons head until it rests tightly against your neck.


Finally ensure the persons thumb is pointed toward the ceiling and that you have a firm grip on their wrists. Then slowly begin to lift your hips. If you were being attacked do this quickly, you will thank me later.  Oh and don't forget, don't stop till you hear it break... This is why people should not attack Jits women!!!!


31 Days of Christmas Submissions: Day 4

Anaconda Choke: This is essentially an arm triange from the headlock position. It works well with the snapdown or as an aid to transition to mount.

Position 1: This version will be initiated from the snap down, shoot your L/R arm across the neck to the opposite armpit. Your biceps should be pressed firmly against the side of your opponents neck.

Position 2: Grab your own biceps and cup the persons back, making sure there is no space between your chest and their back. Then tuck your head down.

Position 3: You will roll/fall to your side, head tucked (this keeps them from rolling over your head)

Position 4: As you finish your gator roll start to walk your legs toward your opponents legs, keeping you arms tight. Think about squeezing your elbows together rather than just pulling back on their neck.

Position 5: Wait for gurgling sounds and a feeling of triumph... Then say nanny-nanny-boo-boo!!


Monday, November 26, 2012

31 Days of Christmas Submissions: Day 3

Loop Choke:

Position 1: This choke is initiated from front headlock off of a scramble or snap down. While your opponent turtles, use right arm to over-hook your opponent's arm and have the left hand grab the opponent's chin. Keeping your chest to the the back of your opponent's head will help control your opponent. Use the right arm, over-hooking your opponent's arm, to open up their lapel. The left hand, across the neck, inserts deeply into the collar to grip the lapel.


Position 2: As you pull the person down the left arm that is holding on to the collar should "loop" around the head. This will put you in a headlock position. Your over-hooked right arm then slides palm-up behind the head as you roll to the side of the over-hook. Shoot your arm deeply behind the head as you walk around. (It is similar to if you were standing with you arms crossed across your body. Reach deeply toward your other biceps.)


Sunday, November 25, 2012

31 Days of Christmas Submissions: Day 2

Day 2: Americana From Mount

This is a great submission though sometimes difficult to get, especially if the persons upper body is stronger than yours. It is important that you learn to use your body weight as an aid in these types of situations.

Position 1: Your opponent is in a defensive position after you have achieved mount.


Position2: Choose an arm, go 2 on one to press the arm to the floor. You should keep your arms straight when doing this using the weight of you body to get the arm to the floor.. We like to work smarter not harder.


Position 3: Drop you elbow down to the mat as a brace to keep the persons arm at a 90 degree angle. If the person is trying to roll you, you can also grapevine the opposite leg to maintain your base. 


Position 4: Run your arm underneath the elbow and grab your own wrist (figure 4)


NOTE: To make this easier after you achieve the figure four grip roll your hand forward as if you were revving up a motorcycle. This will put their hand/wrist flat to the mat. 


Position 5: Begin to pull their elbow in to their body as you lift up on the elbow. Their wrist should stay touching the mat as you do this. Keeping their elbow tight to their body will ensure a faster submission. 


Saturday, November 24, 2012

31 Days Of Christmas Submissions: Arm-Bar from Side Mount

As always, we are a giving bunch. What better way to give back during the holidays than a little woman on woman submission series? Amanda and myself will be demonstrating a submission series for the holidays.

Day 1:

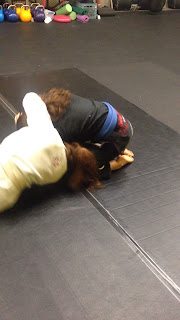
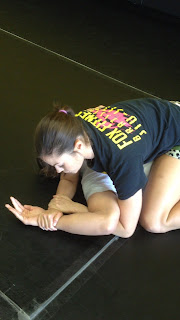
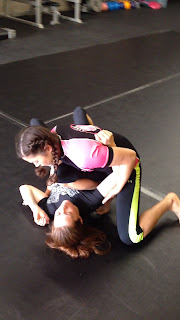
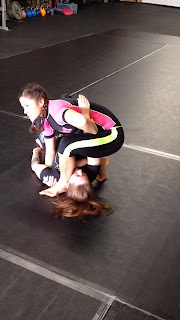
Armlock from Side Mount - this is one of my favorite armlock. Primarily because I love side mount, it is a great position for a smaller defender or a woman. You can initiate good pressure and control from this position and create a tight armbar. If you're really nasty, you can overhook the arm and sit back with it. (Warning: Do not tuck the arm during training. You may hurt your partner but for self-defense definitely an option. Be ready for the snap, crackle, pop part.) This is especially effective on red heads but not as effective as the the ginger cross-face. 

Position 1: 

Position 2: Raise the inside arm and bring your knee in tight to the persons body. 

Position 3: 
post on your right forearm and bring your right shin/knee up to the armpit/chest. Pull up on the triceps of the trapped arm and swing the left leg over the face. Placing it up against the side of the neck. Holding on to the the opposite shoulder as you sit down into the armbar pulls the person to you keeping the armbar tight. 


Position 4: Finish the Armbar- sit back into the arm bar ensuring the thumb is facing toward the ceiling or in the opposite direction of the elbow. Ensure you squeeze your knees together as you sit back to keep the armbar tight.